Showing posts with label tutorial. Show all posts

Sunday, April 26, 2015

DIY Wall of Built-Ins Made From Cheap Bookshelves!

Hey dolls!

I've been meaning to share one of our recent projects with you for weeks, but due to it being my busy season at work just haven't found time. Hubby and I (lets be real, mostly hubby) completed this project in February in less than a day! We wanted something to jazz up our big, bland and empty master sitting room, but didn't want to spend a fortune since we don't really anticipate using the space much. I asked hubby to do a big built-in wall unit when we moved in, but the size of that project is I think what ultimately put it on the back burner for 2 years. On a whim, we decided to use a time and money saving hack instead and I'm so glad we did! Ultimately, I think we have less than $170 and 8 hours in this project, which is minimal compared to the labor and cost of having custom built-in cabinets installed.


Pinterest is literally bubbling over with posts on "Ikea built-in hacks" or "DIY Ikea Cabinets" where folks buy several sets of inexpensive white Ikea cabinets, mount them to the wall, then add frame pieces or crown molding on top and quickly and inexpensively have something that looks like custom built-in cabinets.  It's genius! Our idea was really similar, but we didn't want white, don't have an Ikea anywhere nearby and wanted to add face frames to ensure all of the cabinets looked like one unit.

Since our bedroom is decorated in black, tan and gold, we decided to go with black cabinets. We went to our local Big Lots, where we bought 4 black bookshelf kits for $30 each, which I assume even outcheaps Ikea.  I've seen them at Walmart too, so you definitely don't have to live in an Ikea town to make this work. After bringing them home, hubby assembled them, which didn't take long. To add height and make them look more custom, he built a base in the footprint we decided on out of 2x4s, attaching the base to the wall for stability. We decided to position the middle two bookshelves further out to make it more dynamic.


After situating the bookshelves in place, he attached each of them to the wall. The last carpentry steps were to cut then nail base molding and crown molding to the top and bottom (covering the base and sitting above the top) then, and I felt strongly that this was the most important step, added face frames to each and every board out of inexpensive 1 inch by 1.5 inch pine strips. This made the unit look like one piece as opposed to what it really is, 4 cheap bookshelves placed side by side. It also gives the illusion that the cheap, thin boards are two or three times as thick as they really are. One thing I've found in all of our DIY'ing and home design adventures is that the thickness of your boards goes as far as anything else aesthetically. Thin wood almost always looks inexpensive, and unfortunately, $30 pre-fab bookshelves are made of very thin wood.


We then painted all of the molding and face frames black to match the shelves, paying close attention to match the gloss level of our pre-fab cabinets, again for the sake of cohesion. After everything dried came the fun part - decorating! Leaving the bottom row open for utility/storage, I decorated the top rows in black, gold and white, mostly with things I already had.


True story: I have so many picture frames (I can't ever find the backbone to demote a photo from frame to album, so in our house, once in a frame, always in frame - I'm such a softy) that I literally have them stockpiled without enough surface area to display them all (fortunately there were several in black and gold). My formal living room was a little over decorated, so I pulled several gold items from there. As always, I love to decorate with books, and one of my favorites, The History of Mathematics, was a perfect fit with its rich black spine.


I had two black mini candelabras that I picked up at an antique mall for $2 each that I decided to spray paint gold for more pop. I added the fake white orchid to the table (which was brown, but we painted to match the new unit) for color, which I picked up for 90% off ($2) at Michael's after Christmas. For some reason, the glitter on it made it part of the Christmas collection, which made it more, not less desirable to me, but I gladly accepted the discount. I also added some fake crystals (I keep a stockpile of them in my craft room) to the chandelier for more pizzazz. Stringing the crystals was by far the most time consuming part of my work on this project, mostly because I have no motor skills and huge fingers.


If you're looking for an easy, inexpensive way to fill up a wall and improve your home, I highly recommend this one! Unlike many of our projects, I feel like this one could be easily modified to suit any skill level. Thanks for reading dolls!

Sunday, November 30, 2014

Christmas Tree Decorating Tips & Tutorial!

Hey barbie dolls!

I hope you all had a lovely Thanksgiving and Black Friday! Hubby and I enjoyed an amazing Thanksgiving meal with my family. It has always been one of my favorite meals of the year, especially with my uncle and aunt cooking. Then we set out to score Black Friday deals all over North Raleigh, which I'm pleased to report we did.

In the most recent BDH blog survey, you ladies said you wanted more tutorials, or "tutes" as so many of my blogging peers call them. After thinking about it, I don't think there's anything I'm more qualified to tute than how to decorate a Christmas tree. With 27 of my own, it was hard to choose which one to use as an example, but I chose our red and gold, 9 ft, artificial living room tree.


Planning and Prep
  • Before diving in, make sure you identify a cohesive color scheme and/or theme and stick to it. For this tree, the colors are gold and red. For best results, don't deviate from your color scheme/theme at all (even if you find a really, REALLY cute gold, red and purple ornament at the ornament store).
  • Buy your supplies. The majority of my trees came from At Home (formerly known as Garden Ridge), but I've found high quality trees at great prices both before and after Christmas at Walmart, Hobby Lobby, Michael's and Kmart. If your tree isn't pre-lit, you'll also need lights. Make sure your light wire matches your tree's color (i.e. white wire with white trees, green wire with green trees). When picking out ornaments, I like to pick up things from several stores so things don't look like they all came from a boxed set. Bulbs make good filler ornaments, but make sure you mix in other types of ornaments that work with your theme. For non-bulbs, I like to have multiples of each type of ornament to make the tree look cohesive.
  • If your tree has been in storage, give it a few spritzes of Febreeze before decorating.
  • Always test your lights before beginning tree set-up (hubs and I have learned this lesson the hard way)
  • Find a good place to put your tree (or trees), remembering that corners require fewer ornaments than trees placed against a flat wall or floating in a big space. Plan for all angles your tree will be visible, not just the front. Consider access to outlets, long extension cords running through your house can be a hazard and aren't the cutest. Bonus points if you can position your tree to be visible through an exterior window or reflect in a big mirror. ;)
Set-up
  • For artificial trees, I learned early on from my tree-loving godmother to make sure you sufficiently "fluff" your branches to give your tree the fullness the photo on the box promised you it would have. Fluffing a tree involves making sure none of your branches are stuck together and spreading each branch into "starfish" to cover holes on all sides. 
  • Also make sure you don't have any limbs clearly pointing against the grain of the rest of the tree. 
  • Take a few steps back to identify holes, then manipulate the branches to fill those holes. If you can't fill them all, we've got more tricks to fill them later in this post.
  • Install your lights for non-pre-lit trees, working to make sure the lights are distributed evenly and the right end of the plug is hanging at the back, bottom of the tree so it can reach the outlet.

Decorating
  • Now the fun part! I always start my tree decorating with any mesh or ribbon patterns I have in mind and let everything else work around that. For example, with this tree, I have cascading vertical ribbon going down. Some people use pipe cleaner to attach the ribbon or mesh to the branches, but I've always preferred using the branch tips to tie each piece in place for a more natural look (but I don't think you have this option for natural trees).
  • I always like to incorporate mesh or ribbon to give the tree as many different materials as possible which makes it more dynamic, but if you don't plan on doing that, I'd say start with your biggest ornaments. Cascading large ornaments should come first (like my HoHoHos on this tree) since they take the most room. Make sure they're evenly distributed, with an emphasis of keeping them in the middle and bottom of the tree (big ornaments overwhelm tree tops). Also, big ornaments are perfect for blocking any big holes you have left. 
  • Make sure with all ornaments, especially the big ones, that they're embedded in the tree and not too far protruding from the tree's frame. This can cause balance issues and can disturb the tree's overall lines.
  • Don't forget ornament hooks! I can't say this enough, but make sure you use ornament hooks (they're like 200 for $1 at Walmart) on any ornament that doesn't have its own hook or ribbon already. Trying to put a branch through a tiny metal hole will almost always make the ornament hang in a non-natural looking way, which looks forced.
  • Once your bigger ornaments are in place and evenly distributed, work in any focal point ornaments you plan on using, keeping some key favorites at eye level. 
  • After the focal point or special ornaments, work in your filler ornaments, such as bulbs. Make sure your colors are evenly distributed (i.e. not too many of one color placed together). Keep smaller ornaments at the top, where they're more size appropriate and to make up for having more of the bigger ornaments at the bottom.
  • If your ornaments vary in finish (which is always a good thing - makes the tree more dynamic), make sure your matte, glossy and glittery ornaments are evenly distributed in the same way your colors are evenly distributed.
  • Now on to picks - one of the most important things you can do for your tree! I always do picks last to fill in any holes, put I could also see the benefit of doing them first as well, as they're great focal points. Picks make a tree so much more dynamic, and in my opinion, can turn a good tree into a great one. Walmart sells some picks, but Hobby Lobby is the mecca if you can get to one - they have several pick aisles! NC friends - the closest you'll find a HL is Burlington or Danville, VA... the struggle is real. Michael's also has a decent picks section, but the majority of theirs are pretty small.
  • Don't forget the tree skirt - tree legs aren't pretty! If you can't find what you like in stores or if the increasingly hefty skirt prices aren't working for your budget, go to the fabric store and pick up a yard or two of fabric, cut a line from one edge to the fabric's center, and swirl it around your tree, folding any corners under the rest of the fabric.
  • Don't forget the topper either! Here, anything you like goes, just make sure the size is proportional to your tree size (no tiny toppers on giant trees). Bows, stars, angels, pick clusters - anything special to you will work! For bows, make sure you purchase wire edge ribbon (otherwise crafting with it will be near impossible). Unless you're doing a mini tree, stick to 2 inches wide or wider.
  • For extra pizazz, coordinate your wrapping paper with your tree's theme or colors. It costs no more, just takes a little extra planning.

In Sum:
  • When it comes to Christmas trees, more is more. If you look around, you'll notice that trees with more ornaments and materials almost always look better than their more scanty counterparts.
  • The best trees are always the ones that mean something to you personally. I love this red and gold tree and it has become our living room tree because the first ornaments we bought together as a couple were red and gold and are incorporated into this tree. They're also my two favorite Christmas colors. Long story short: don't try to please others or do what you think is trendy on your tree, do what speaks to you and find a way to incorporate the ornaments or themes you love.
  • Dynamic Christmas trees are the prettiest Christmas trees. The more variation in material, finish, size and shape on your tree, the better it will look, I promise. To me, the best trees always include ribbon and/or mesh, bulbs of multiple sizes, specialized ornaments, picks and lights. 
  • A cohesive look is key. Try not to stray from your theme if you can help it.


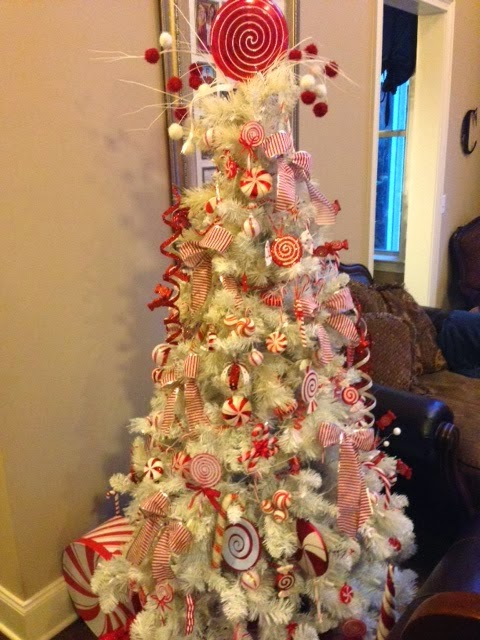
    I've included a couple others from my 27 tree collection below for more styles and examples. :)


    I hope some portion of these tips have been helpful to each of you. Stay tuned for more tree reveals in the coming weeks. HAPPY DECORATING!

Sunday, January 12, 2014

DIY Painted Chevron Picture Frame with Burlap Bow Tutorial!

Hello dolls!

Last week, we were featured on the fabulous A Glimpse Inside Blog with a tutorial on how I made a chevron picture frame with it's own burlap bow for under $5! It was easy, cute and super inexpensive, so check out my tutorial below if you're interested in making your own!
The Supplies: 
A wood frame from Michaels ($1 - 2, depending on size, mine was $1) 
Paint in your choice of color(s) (you'll need 2 if you plan on doing the chevron pattern) 
A piece of paper/card stock and a pencil (if you want to trace the chevron pattern onto the frame) 
A medium sized paint brush Burlap ribbon (less than one yard)(available at Michaels, Walmart and Hobby Lobby) 
A flat Christmas ornament (optional) 
A hot glue gun with glue stick 
The Steps: 
1. Paint the frame the color of your choice. If you want to keep the frame all one color, you can skip step 
2 and go straight to step 3. 
2. Using the paper or card stock, trace the chevron pattern with a pencil. The paper helps to ensure you're using straight lines. After tracing, paint along the lines carefully with your second paint color to complete the chevron pattern. If you're anything like me, you won't be able to trace the lines perfectly, but the pattern will still be discernible! 
3. After letting the paint dry and plugging in your trusty glue gun to let it heat up, make a bow out of the burlap. I also used a small scrap of burlap ribbon to tie around the center of the bow to make it extra secure. 
4. Glue the back, center portion of the bow to the frame in the top center, top left, bottom center, or anywhere else you think looks cute! I chose the top center of the frame because my bow was so big. Press it down firmly for a couple seconds to ensure it stays in place. You might also spot on a little glue within the bow to make sure it doesn't come undone. 
5. If you also have a flat ornament you would like to add (now is a great time to get them for 50-75% off) hot glue that wherever you think is appropriate. I got this one in a two pack from Garden Ridge for $1 (50% off)! I love using the fleur de lis and glitter is always welcome in our house. 
6. Don't forget to insert a special photo to make it your own, and voila! You not now have a chevron and burlap picture frame that you can tell everyone you made yourself - and on the cheap! 

Related Posts Plugin for WordPress, Blogger...